


After a very hot growing season in my neck of the woods, and various summer gardening duties, it was time for me to put my garden to sleep and start making plans for projects produced from what I grew in the garden over the summer. One of my favorite to work with is the dried okra pods.
Above are my finished white, blue and pink themed okra pod angels. You can design your own with your special colors and styles in mind. I will list the basic materials needed and guidelines for stages of her development. Most items can be purchased from craft stores.
Materials needed:
Assembly guidelines:
Tip:
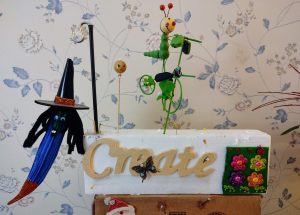
I have found it easier to do the dressing and drying phases if I am able to hang the pod while I work. I made a stand for this process from a Styrofoam block, a large straw and ‘S’ hook to hang pod on. I’ve included a crude image of my ‘dressing and drying’ box. You can definitely tell the difference between my photos and the stock photos! Zelda, my Halloween Pod Witch is hanging on the ‘S’ hook. I find it challenging to describe craft project and all steps exactly, so any questions feel free to contact me.
“Life is a series of obstacles preventing me from crafting”
-Scrapbook.com

“Life starts all over again when it crisps in the fall”.
-F. Scott Fitzgerald
Wood smoke in the air, chilly sweater weather, and falling leaves is my favorite time of the year. Fall sends colorful autumn leaves soaring from the trees, as the winds of change begin to blow. Spring and summer seasons cannot arrive with their bounty of new tree leaves and daffodils popping up, without first a little bit of cold.
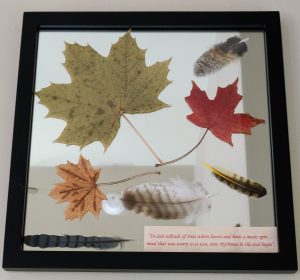
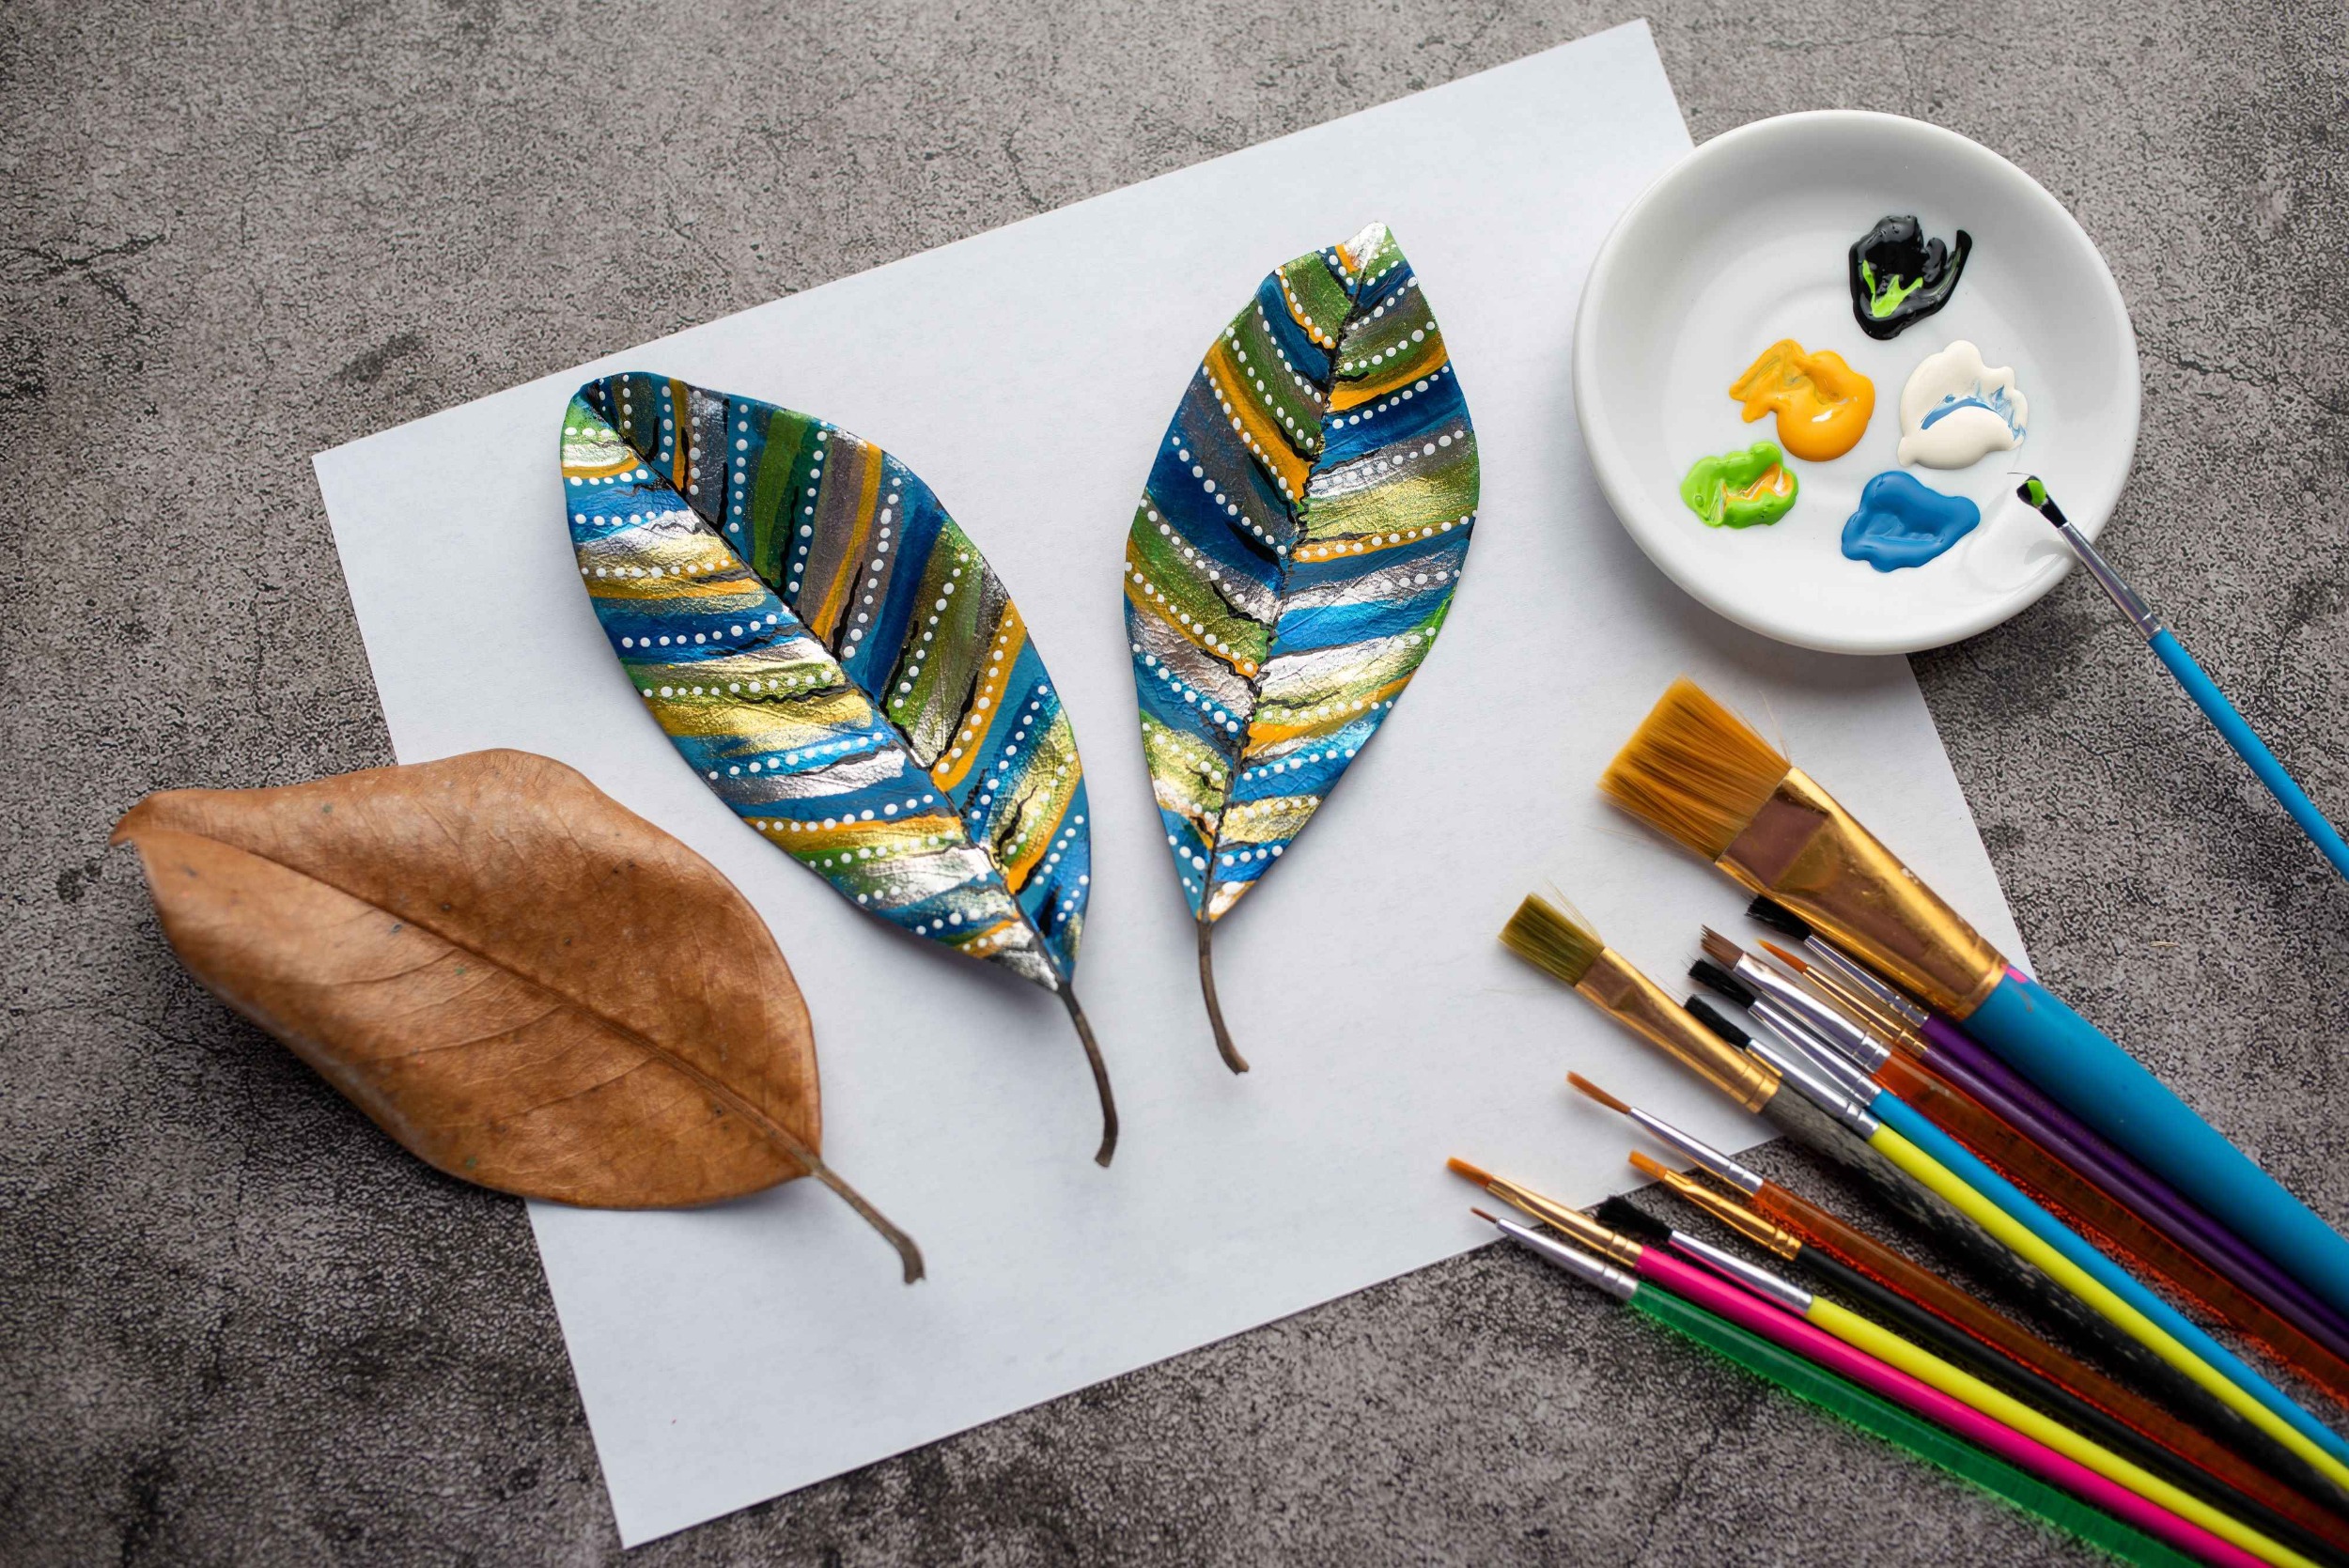
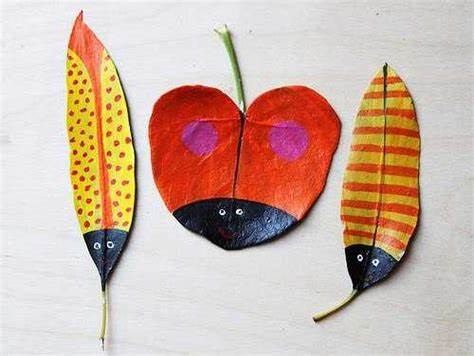
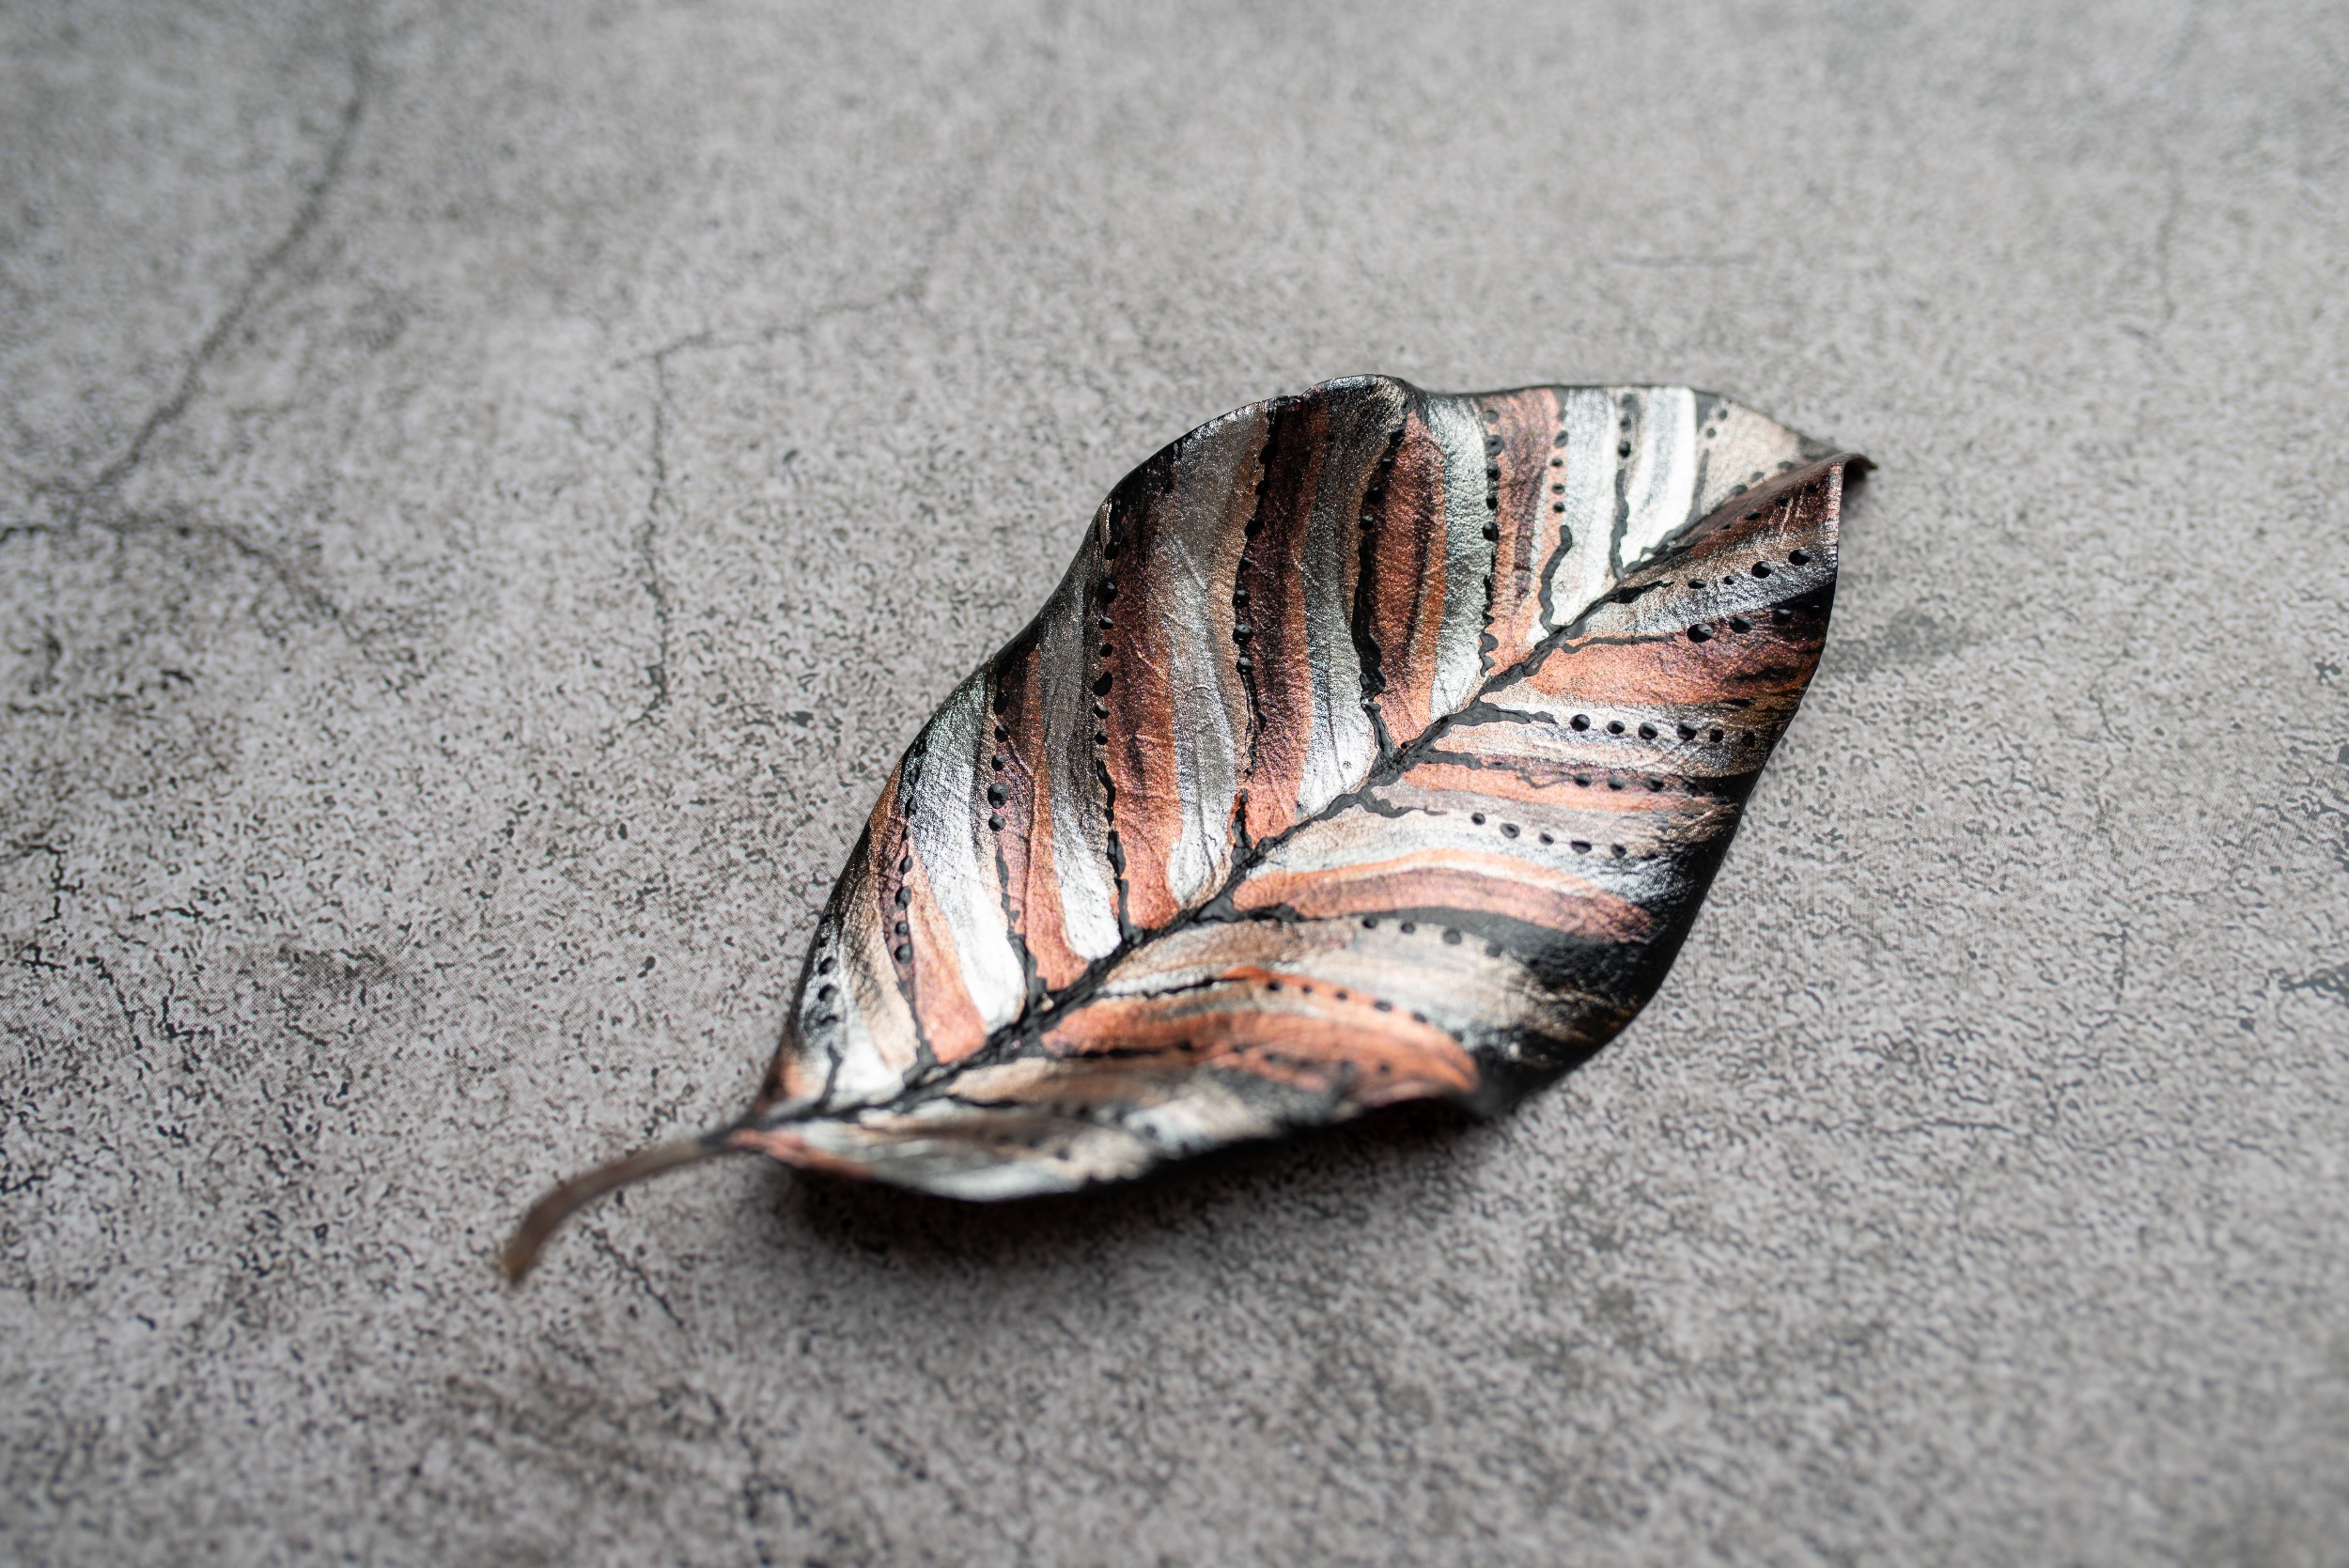
Collecting and drying autumn leaves to be painted is an enjoyable activity. Try to find leaves of various shapes and sizes, without noticeable damage. Small imperfections are painted over. Painted leaves are beautiful framed, but you can use plain dried leaves as well to make a collage. I like to add feathers to the composite too.
Process to dry leaves without a commercial drying press:
“Autumn leaves don’t fall, they fly. They take their time and wonder on this their only chance to soar”.
-Delia Owens
“Every artist was first an amateur”.
-Ralph Waldo Emerson
Wood smoke in the air, chilly sweater weather, and falling leaves is my favorite time of the year. Fall sends colorful autumn leaves soaring from the trees, as the winds of change begin to blow. Spring and summer seasons cannot arrive with their bounty of new tree leaves and daffodils popping up, without first a little bit of cold.
Collecting and drying autumn leaves to be painted is an enjoyable activity. Try to find leaves of various shapes and sizes, without noticeable damage. Small imperfections are painted over. Painted leaves are beautiful framed, but you can use plain dried leaves as well to make a collage. I like to add feathers to the composite too.
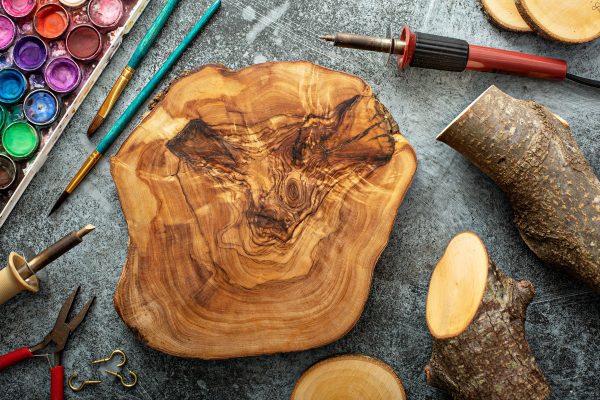
Having only completed two pieces of wood burning projects, I am far from an expert on the craft, but love seeing an image created on a piece of wood. Wood burning tools and pieces of wood can be purchased from art and craft supply stores. Soft wood is easier to burn than hardwood. However, both woods have their disadvantages. It is very easy to burn too deep in soft wood…hard wood can resist a clean burn. Practicing on a small sample of the wood you choose is a good idea. Practice getting an idea of how much pressure you need to exert to get a clear burn from the particular tool you are using. Once you have the project clearly in mind, assemble the items you will need. I loosely outline a complete plan of what I have in mind and take a photo with my phone so I have that image to refer to as I work the piece.
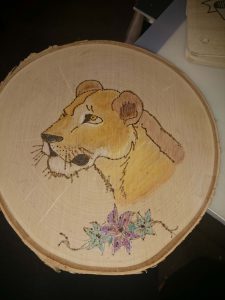
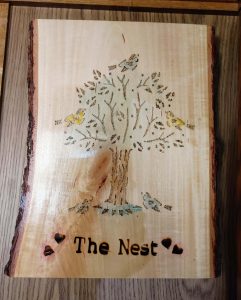
I used two methods of placing an image on the wood. One, called “Lioness”, I traced the image using a ballpoint pen onto the piece of wood using graphic paper. This method needs a steady hand and care to trace just the image and not smudge the wood around your image. Craft two, called ‘The Nest”, I used a stencil to place the image on the wood. I taped down the stencil so it stays in place, while using a ballpoint pen to trace the open spaces in the stencil. After your image is to your satisfaction, it is time to heat up your burning tools. Wood burning kits come in varying sizes and styles. Various tip points, plain style letters, numbers, symbols, and calligraphy. You can add to these styles over time, but a beginning kit will do just fine.
To finish my projects, I shaded in areas with colored pencils, and sealed the wood with polyurethane. You can skip the sealing if you want just a natural look, but sealing helps keep the wood and image looking great for many years. Obviously, this craft musing is for newbies to wood burning. I Googled images of wood burning by very talented artist…very beautiful pieces of art.
“Learn the rules like a pro, so you can break them like an artist”.
-Pablo Picasso
“If youre digging a hole in the wrong place, making it deeper doesn’t help anything“.
–Seymore Chwast
I live in what I lovingly call a thimble sized ‘Nest’ of a studio apartment and have been asked how I keep everything organized considering all my interests. When arranging my belongings, it’s as if working a Rubix cube. Pull one decorative box out slide another in its place. With crafting hobbies and literary pursuits come much ‘stuff’ to pursue individual projects.
Crafting supplies grow like colorful and cheerful looking mold. I thoroughly enjoy looking at quarters of fabric and sparkling paper stock is a favorite. It’s great to know you have those items on hand but where exactly are they lurking? I think the base requirement for getting a craft project from conception to completion – is an organized inventory. It saves money and reduces stress. Yes, crafting is often stressful. And countless times I have bought another replacement widget when I already had several of the same widget buried under green glitter paper stock. Continuously adding to the jumble of craft supplies.
Crafting for the most part is a clean activity requiring a sundry of containers to corral the oodles and oodles of craft supplies. Two of my favorite inventory tamers are decorative boxes and plastic hanging shoe holders. The boxes come in many sizes, colors, and materials and make perfect storage. They are easy on the eye and give a focal point of order – no one need know the yarn is tangled inside a small box with a wren sitting on a teacup. See through hanging shoe holders can be utilized as storage and display areas. It is easy to spot the glues dots – salmon colored silk roses – or small completed card projects.
For storage areas that can’t be seen with the naked eye I like the old-fashioned Rolodex to list the location of an item. Going with one of my quirks to name everything – “Hunter” the rolodex can answer my question of “where the hell is it” with the flip of a card. I’ve gotten paint and glue on too many cell phones and laptop keyboards to make an inventory on my devices.
Crafters will empathize with how much excess scraps of materials can come from working projects over time. I still love making handcrafted personalized greeting cards and lots of bits and pieces of paper stock accumulates. It seemed wasteful to only recycle the paper – so I started donating my surplus paper stock and other craft items. Since I started this procedure, my craft supplies are more manageable and rather than feeling wasteful I feel good knowing another crafter will enjoy my contribution.
“A good system shortens the road to the goal“.
-Orison Swett Marden